

Vibe coding guide for beginners
By Lovable & Windsurf

Hi all,
Welcome to this beginner's guide on building personal websites using Lovable and Windsurf!
I’m Jungkeun (JK) at Berkeley MBA. Now, I call myself a vibe coder, vibe builder 😂

After experimenting with +10 AI coding tools including Lovable, Bolt, Windsurf, and Cursor, I've learned some valuable lessons. (Check here if you want to know more)
Like many beginners, I started by simply typing prompts into the chat. While the initial results were exciting, I soon hit some roadblocks.
When I tried to add more specific details or make refinements, the process became frustrating and time-consuming.
Through trial and error for a few months, I discovered that careful project planning and writing clear, detailed prompts are crucial for success. Giving the right instructions to AI tools makes all the difference.
That's why I created this step-by-step guide to help other beginners avoid common pitfalls.
Let’s make your personal website stand out ✨
In this guide, we'll cover:
Common mistakes to avoid
Planning your website effectively
Writing effective AI prompts
When to switch from Lovable to Windsurf
1. Common Mistakes
Many beginners start with Lovable's simple promise: "Just chat and watch the magic happen!" While this sounds great, let's look at a real example.
Say you want to create a portfolio website. A good approach is to start with inspiration - I particularly like Brett Adcock's site (Figure AI’s founder):
https://www.brettadcock.com/

You might prompt:
Hey, I’d like to build my personal website, like attached image, please make my bio, working experience and please you my information in the linkedin: https://www.linkedin.com/in/jungkeunhong
Let me show you what happens when we try this basic approach...
https://jungkeun-profile-page-maker.lovable.app/
The design is not good. There are more major issues:
The information is completely incorrect - it shows me as a product engineer at Airbnb, which I've never been
The styling is quite basic - the fonts, colors, and animations lack visual appeal
If you want to create a website that truly stands out and impresses others (not just something that sits on your desktop), you'll need to take an iterative approach.
Here's my design process:
First, clearly define your website requirements across these key areas:
Overview
Design
Content
Tech stack
Let me show you how I use LLM (I like Claude) to develop these requirements in detail. (Use LLM whatever you want)
2. Planning your website effectively
You: Hey, You’re a prompt-engineering and website-design guru. I’d like to build a lovable personal website—could you outline the key components I should plan for (overview, visual design, content, and tech stack)?
It says:

This gives us a lot of useful information.
Let's take it a step further based on these components.
Here's how I would ask Claude:
Looking for a detailed LLM guideline.
Please cover: Overview, Design, Content, Tech Stack.

Overview:
- Personal website for job search
	- Jungkeun, 1st-year UC Berkeley student
	- From Korea
	- Work experience: McKinsey, Sendbird
- Structure: homepage, about/bio, portfolio, contact, resume/cv

Design:
- Minimal, professional, clean style
- Primary color: red with gradient
- Subtle animations and hover effects
- Fonts: Cormorant, Lato
- Responsive (web/mobile)

Tech Stack:
- Next.js
- Tailwind CSS
- shadcn/ui
- Framer Motion
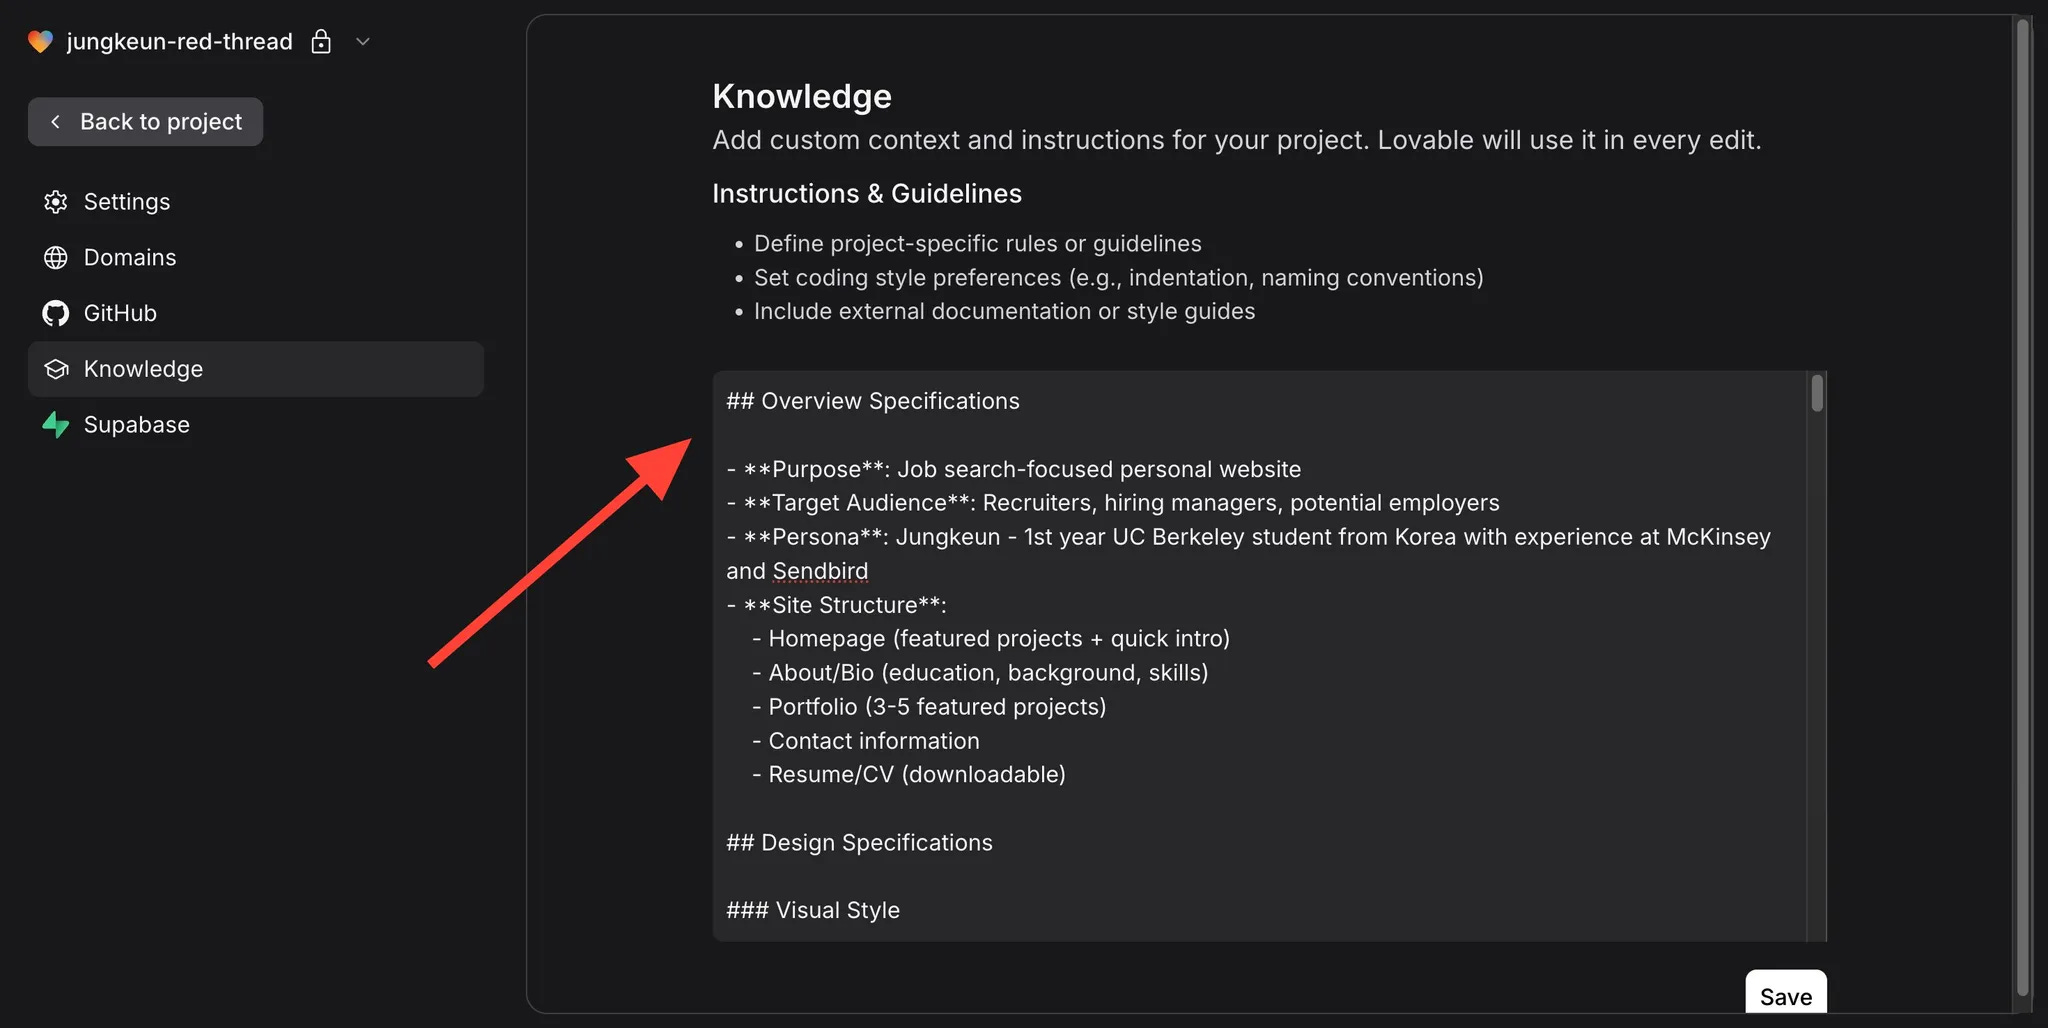
Claude then provided this detailed response (Let's quickly skim these details before moving on to section 3)Overview Specifications
Purpose: Job search-focused personal website
Target Audience: Recruiters, hiring managers, potential employers
Persona: Jungkeun - 1st year UC Berkeley student from Korea with experience at McKinsey and Sendbird
Site Structure:
Homepage (featured projects + quick intro)
About/Bio (education, background, skills)
Portfolio (3-5 featured projects)
Contact information
Resume/CV (downloadable)
Design Specifications
Visual Style
Primary Aesthetic: Minimal, professional, clean
Color Scheme:
Primary: Red with gradient (#FF0000 → #FF6B6B)
Secondary: White (#FFFFFF)
Text: Dark gray (#333333)
Accents: Light gray (#F5F5F5)
Typography:
Headings: Cormorant (serif)
Body: Lato (sans-serif)
Weight combinations: 300, 400, 700
Spacing System:
Base unit: 4px
Content padding: 24px
Section spacing: 80px
Animation Guidelines:
Subtle fade-ins on page load
Smooth hover transitions (0.3s)
Text animations on homepage (typewriter effect)
Component Design
Navigation: Sticky, minimal with hamburger on mobile
Hero Section: Full viewport height, gradient background
Project Cards:
Clean borders (1px)
Shadow on hover
Image + brief description
Tags for technologies
Resume: ATS-friendly design, downloadable PDF
Contact Form: Minimal fields with validation
Content Structure
Homepage
- Hero Section
  - Name: Jungkeun
  - Headline: "UC Berkeley Student | Former McKinsey & Sendbird"
  - CTA Button: "View My Work"

- Featured Projects (2-3)
  - Project thumbnails
  - Brief description
  - "View Project" links

- Quick Bio
  - 2-3 sentences about background
  - Link to full About page
About/Bio
- Education
  - UC Berkeley (1st year)
  - Previous education in Korea

- Professional Experience
  - McKinsey (position, duration, 2-3 key achievements)
  - Sendbird (position, duration, 2-3 key achievements)

- Skills Section
  - Technical skills
  - Soft skills
  - Languages (Korean, English, others)

- Personal Story
  - Background in Korea
  - Journey to Berkeley
  - Career aspirations
Portfolio
- Project Grid (3-5 projects)
  - Each project includes:
    - Project title
    - Visual (screenshot/mockup)
    - Problem statement
    - Solution approach
    - Technologies used
    - Results/Impact (with metrics if possible)
    - Link to live project/GitHub (if applicable)
Contact
- Simple form
  - Name
  - Email
  - Message
  - Submit button

- Direct contact information
  - Email address
  - LinkedIn profile

- Location
  - Berkeley, California
Technical Implementation
Tech Stack Details
Framework: Next.js (App Router)
Page structure:
app/page.tsx (Homepage)
app/about/page.tsx
app/portfolio/page.tsx
app/contact/page.tsx
app/resume/page.tsx
Styling: Tailwind CSS
Custom theme configuration:
// tailwind.config.js
module.exports = {
  theme: {
    extend: {
      colors: {
        primary: '#FF0000',
        primaryLight: '#FF6B6B',
        dark: '#333333',
      },
      fontFamily: {
        heading: ['Cormorant', 'serif'],
        body: ['Lato', 'sans-serif'],
      },
    }
  }
}
UI Components: shadcn/ui
Core components to implement: Button, Card, Form, Input, Tabs, Sheet (mobile menu)
Animations: Framer Motion
Implementation examples:
// Page transition animation variants
const pageTransitionVariants = {
hidden: {
opacity: 0,
y: 20
},
enter: {
opacity: 1,
y: 0
},
exit: {
opacity: 0,
y: -20
}
};
// Component with page transition animation
const PageWrapper: React.FC = ({ children }) => {
return (
<motion.div
variants={pageTransitionVariants}
initial="hidden"
animate="enter"
exit="exit"
transition={{
duration: 0.5,
ease: "easeInOut"
}}
>
{children}
</motion.div>
);
};ion.div>
Performance Optimization
Next.js Image optimization
Font optimization with next/font
Static site generation for all pages
Lazy loading for non-critical components
Image format: WebP with JPEG fallback
SEO Implementation
Meta tags optimization
Open Graph metadata
Structured data for personal profile
Semantic HTML structure
I know it’s long, but use this as your project guideline for perfect website.
3. Writing effective AI prompts
Now, let's use our detailed guidelines to create a prompt for Lovable.
I asked prompt to Claude and here's what it generated:
Build a personal portfolio website for Jungkeun, a 1st-year UC Berkeley student from Korea with work experience at McKinsey and Sendbird.

DESIGN SPECS:
- Style: Minimal, professional, clean
- Primary color: Red gradient (#FF0000 → #FF6B6B)
- Typography: Cormorant for headings, Lato for body text
- Components: Implement subtle animations on scroll and hover effects

TECH REQUIREMENTS:
- Next.js with App Router
- Tailwind CSS for styling
- shadcn/ui for UI components
- Framer Motion for animations

SITE STRUCTURE:
1. Homepage with hero section and featured projects
2. About/Bio page with education and professional experience
3. Portfolio page with 3-5 featured projects
4. Contact page with form and direct contact info
5. Downloadable Resume/CV page

KEY FEATURES:
- Responsive design for mobile and desktop
- SEO optimization
- Fast load times
- Subtle animations
- Clear call-to-actions

Please implement the first component: A responsive navigation bar with the site structure listed above.
Next, paste this prompt into Lovable, making sure to include any reference images and links.
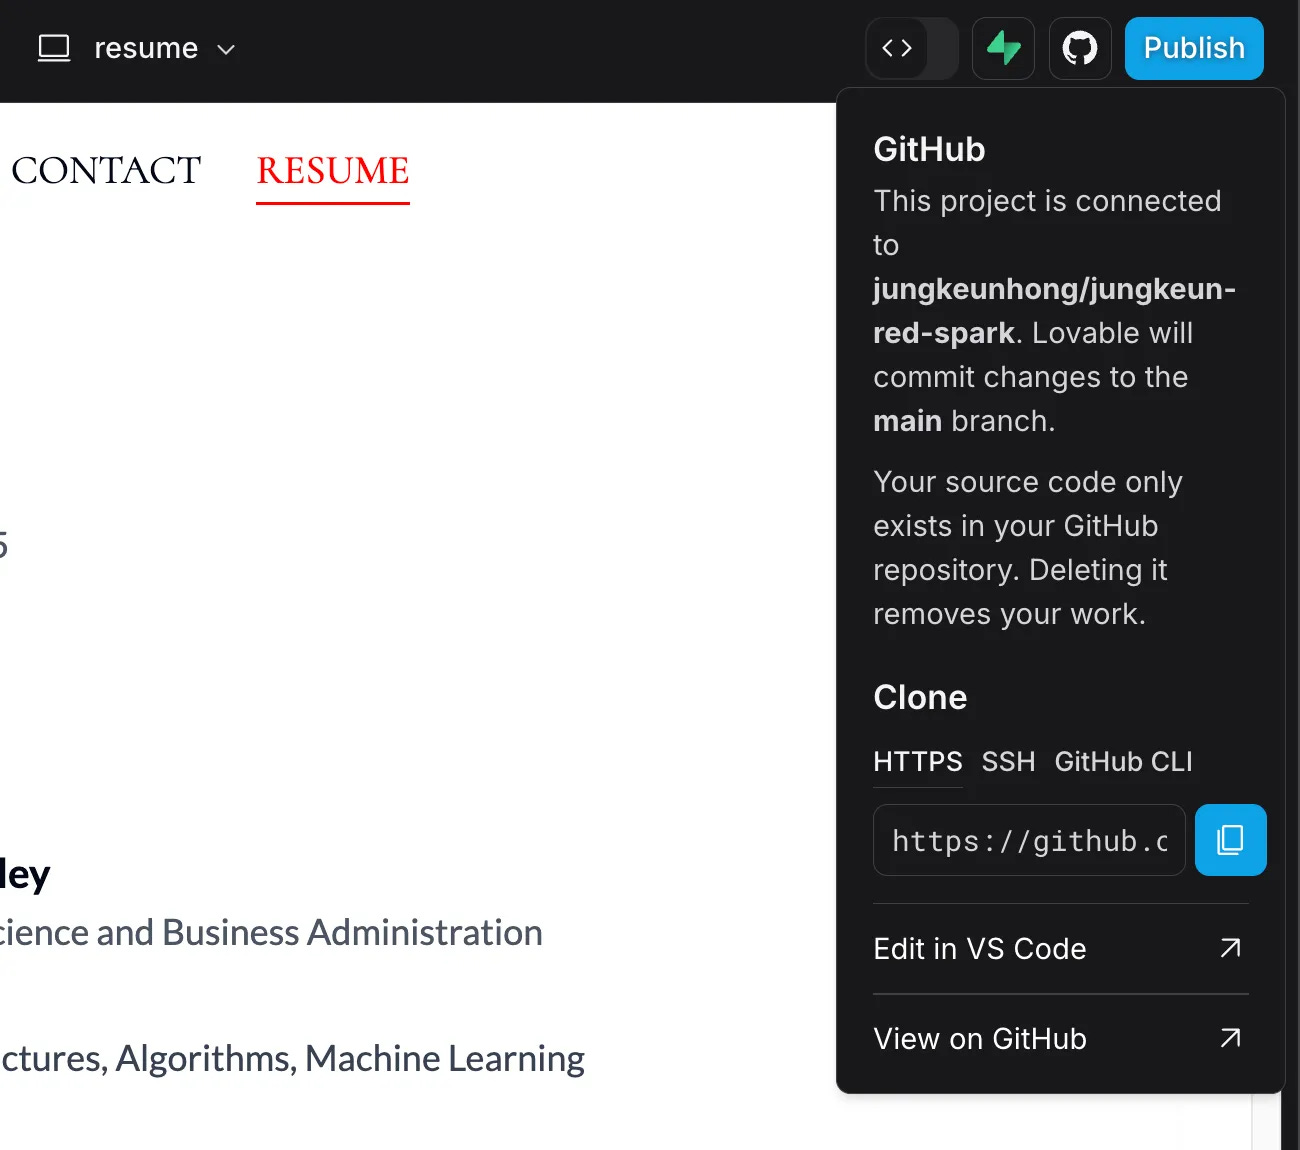
https://jungkeun-red-spark.lovable.app/resume
Let's look at the improvements:
The structure is better organized
The fonts, colors, and animations look more polished based on our guidelines
Don’t forget to copy your project guidelines into Lovable to get started after first prompt!
4. When to switch from Lovable to Windsurf
However, this draft isn't quite ready to share professionally on LinkedIn or with recruiters yet.
Limits are:
Missing profile and portfolio images
Can't convert to a single-page design
While Lovable is great for getting started, it has some constraints:
No direct code editing capability, which means you can't add your own images or videos (like your headshot)
Limited options for additional UI libraries and animations
This is where Windsurf comes in handy.
Windsurf is a developer's tool (IDE), but don't worry - you won't need coding experience at this stage!
Windsurf download link
To get started, you'll need to: link your GitHub account and copy your github link in Lovable
Next, open Windsurf and enter the following prompt with your github link:
Make a new folder for this project, then clone the repository, install dependencies, and open the folder: https://github.com/jungkeunhong/jungkeun-red-spark.git
Also ask ‘preview in windsurf’
Great! You've now cloned your GitHub repo and can start working with the Lovable code on your computer.
Now, create an 'images' folder in the 'public' directory and add your profile photo to it
Then, simply paste the element where you want your photo to appear into the chat.
Specify which image to use, and you can see it live in the preview!
Great! I've successfully added my headshot to the website.
That’s it! Isn’t it easy?
Now it's your turn to explore and customize your own website.
I hope you found this guide helpful!
Side notes
This is how I interacted with Claude: https://claude.ai/share/350d10a2-dd36-46bc-9a8d-c1d13941055a
While it's easy to make a simple website, building something more serious takes hard work and a few late nights of work.
But the effort was totally worth it - I had fun and learned so much about web development!
If you chat more about vibe coding and AI agent (I’m building this stuff), feel free to DM me!